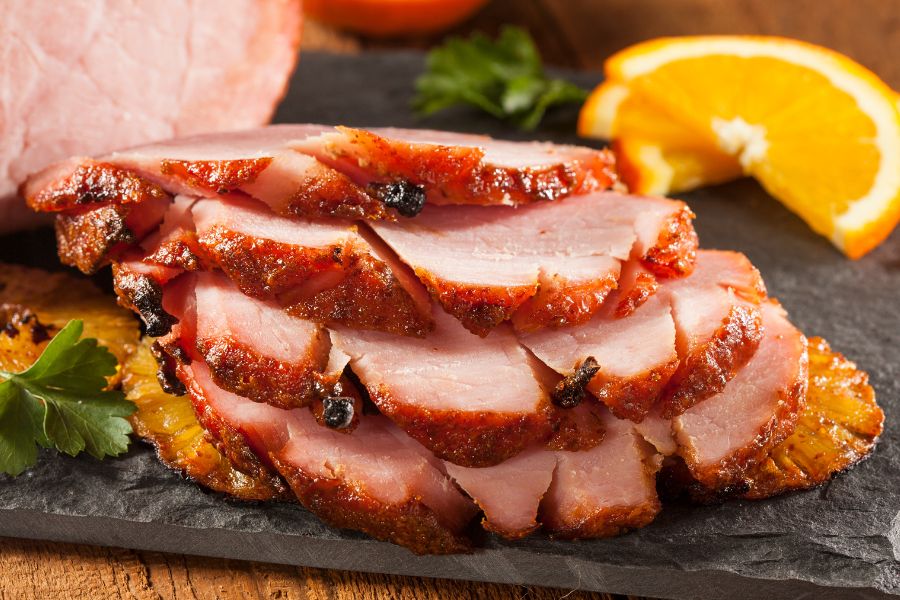
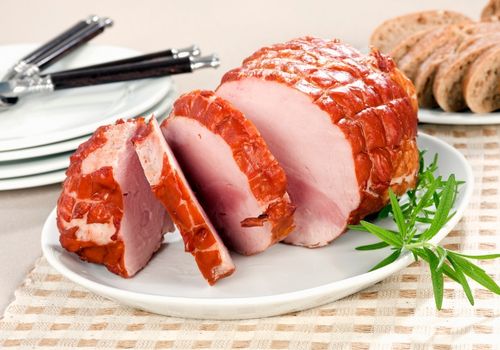
A perfectly caramelized, golden-brown smoked ham is a beloved holiday meal for families all across the country. It goes perfectly with glazed carrots, mashed potatoes, cornbread, pasta, and a nice gravy. The list is extensive.
The only thing that beats a store-bought cured ham is a home-cured ham that you have brined yourself. Brining ham is one of those culinary tasks that most people assume is harder or more cumbersome than it actually is.
I grew up on a farm and can say with certainty that one attempt is more than enough to make you an expert at ham brining. In this article, I will give provide a step-by-step recipe that you can use to brine ham along with some pro tips to make your ham truly great. Let’s get started.


Put the kosher salt, pink salt, brown sugar, pickling spices, and molasses in a large air-tight food-grade container. Ensure the container is large enough to accommodate all 7 pounds of your ham.
Boil one gallon of water and pour over the ingredients in the container. Mix the ingredients thoroughly to completely dissolve the mixture. This makes a wet cure.
Add the remaining three gallons of water to cool down the mixture. The brine is ready.
On a chopping board, cut the 7-pound ham into two equal chunks. If you choose to keep the skin, then score (making cuts or slits through the skin and fat but not into the meat) the chunks to ensure the brine soaks evenly into the meat.
Immerse the chunks into the brine and ensure both chunks are submerged. You can place a Ziploc bag containing water on top of the meat to ensure they remain submerged in the brine throughout the brining time.
Cover the container and place it in the refrigerator for 3 ½ days. After two days you can turn over the chunks and disturb the brine (this is optional).
After 3 ½ days, remove the container and take out the ham. Discard the wet cure and rinse your brined ham thoroughly under running water.
Submerge the chunks in a container filled with fresh water and let them sit in this bath for 15 minutes. The longer the meat sits in the bath, the less salty the hams will be. To rid the hams of as much salt as possible, let them soak in this rinse for 24 hours.
After rinsing to your liking, place the wet cured ham on drying racks or on blotting papers and blot away as much water as possible with paper towels. Leave them to settle and dry further and as they dry, they will form a sticky film called a pellicle.
The pellicle will form a nice golden glaze as the ham smokes or bakes.
Turn on your smoker and set it to a temperature of 225 – 300 degrees Fahrenheit. Soak some apple, cherry, hickory, or maple wood chips in water for 5 – 15 minutes. Place them in the smoker to enhance the flavor of your roast.
You can leave out the wood chips if you’re not going for a smoky wood flavor. Place the ham in the smoker for 3 hours of cook time or until the internal temperature of the meat reaches 160 degrees Fahrenheit.
In the meantime, mix the glaze. Put the mustard, maple syrup, and cayenne pepper into a bowl. Add salt and mix evenly.
Once the ham is fully cooked, remove it and apply the glaze all over the ham using an oil brush. Coat it as thickly as you would like and return it to the smoker for a further 5 – 10 minutes to caramelize the glaze.
Your home brined ham is ready! Yum!
After the ham is fully cooked and glazed, you will be tempted to cut into it immediately and dig in. Instead, let the ham sit for a half hour as the flavors settle; this will give you a better flavor.

Yes. You can use a grill or an oven.
Soak wood chips in water for 40 – 50 mins to prevent them from burning too quickly and raising the temperature of the cooking. The moisture will also help create the smoke.
Place the soaked wood chips on top of the briquettes and set the temperature of your grill to 225 degrees Fahrenheit. Cook for 3 hours or until the internal temperature of the ham reaches 160 degrees Fahrenheit. Remember the goal is to cook the ham slowly.
Putting wood chips in the oven is slightly trickier so be certain that you can pull this off. It should be safe if you stick to the temperature guidelines.
Soak wood chips in cold water for 2 hours and place them on the baking sheet under the rack.
Place the ham on the rack and wrap the entire ensemble in aluminum foil. Ensure that there are no hanging foil ends. They are a fire hazard.
Allow room in the foil for air currents which means your wrap should look like a tent. You need an oven temperature of 225 degrees Fahrenheit. Place your ham in there for a minimum cooking time of 3 hours. Only take it out when the temperature of your roast reaches 160 degrees Fahrenheit.
Instead of wood chips, simply coat your ham generously with your favorite flavor of liquid smoke which will give you the same woody essence with less hassle. After 3 hours of cooking, apply the glaze to your ham and place it back for a further 5 minutes.
Ensure that you pick a fresh ham. Consult your butcher to ensure that you don’t buy a cured or treated ham. The recipe above will not work with treated ham.
To make a truly tender home cured ham, select the fattier cut of pork. You can use just about any cut of pork but the ideal cuts for making the best ham are:
Sodium nitrite or pink curing salt is essential for curing meats because it kills Clostridium botulinum which causes botulism, a serious nerve ailment.
Sodium nitrite also gives your pork roast that enviable pink coloration and a nice salty flavor that we all adore. Without this particular curing salt, brined meat is a plain grayish color. Not very pleasant.
For this recipe, ensure that you buy Prague salt #1 which is the recommended salt for curing meat over short periods such as for a few hours to a few days. Prague salt#2 is recommended for meats that need curing for much longer such as months or even years.
The packaging will contain the necessary directions regarding measurements depending on the size of your meat.
You can inject the pink salt solution directly into the meat to ensure more even distribution. Inject the meat then immerse it in the brining solution as directed above.
For the wet brine, use filtered or distilled water since tap water contains pathogens that may contaminate the ham during the curing process. Tap water also contains chlorine that could interfere with the flavor of your homemade cured ham.
Use kosher salt or pickling salt. They are very fine and dissolve readily in brine solutions. They have a more subtle taste compared to regular salt and are free of impurities. Do not use regular table salt or sea salt. These contain impurities and anti-caking agents.

Brining your own pork means more flavor, so yes, you should absolutely brine your ham. Brining is also a way of curing fresh pork which gets rid of pathogens that could cause health problems.
This depends on the size of the ham. Give the ham one day for every two pounds of pork. For this recipe, we used 7 pounds of pork but we cut the pork into two 3.5-pound chunks.
This means the brining time for this recipe is the brining time for a 3.5-pound chunk of pork making it approximately 1 ½ days.
If you choose to brine the 7-pound ham as a whole, you will need to give the ham 3 ½ days to brine. The brining time is determined by the size of singular chunks of meat and not the total poundage of the ham you want to cure.
A large ham means more brine but you don’t necessarily have to increase the brining time if you increase the amount of meat.
What you need to adjust is the brining recipe to accommodate the extra pounds of meat. The size of the meat does not affect the brining process, only the quantity and composition of the brine solution.
Brining cures meat and makes it tastier by infusing flavor into the meat. When sodium nitrite is used, brining kills pathogens making your meat safe for consumption.
Meat can also be dry-cured which is a preservation method, albeit an obsolete one.
Soak your ham for a day per two pounds of pork.