Before you start flipping burgers or frying up delicious pancakes on your brand new Blackstone griddle, you’ve got to give it some seasoning. First, clean the griddle with a piece of microfiber cloth. Now crank the heat up to the max for 10 to 15 minutes. Next, squeeze seasoning oil over the flat top surface and get every inch coated. Crank the heat again and let it season for 15 to 30 minutes and that’s it.
I’ve been griddling and grilling for ages. So, take my word for it when I say your griddle needs proper seasoning for the best user experience. It’s like a rite of passage for every grill I’ve ever used.
In this article, I’ve got your back with a step-by-step guide to seasoning your Blackstone griddle. We’ll cover everything from prepping the surface to slatherin’ on the oil and achieving that perfect surface.

Having the right tools at your disposal makes all the difference when seasoning your grill. So, here’s a rundown of the essential supplies you’ll need for a successful seasoning session:
When seasoning your Blackstone griddle, you must pick the right oil. We need a high smoke point oil. It must be able to handle the heat without messing up the flavor.
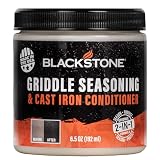
What Blackstone recommends for seasoning its griddles is the Blackstone Griddle Seasoning & Cast Iron Conditioner.
But in general, vegetable oil, canola oil, avocado oil, peanut oil, extra virgin olive oil oreven flaxseed oil are some of my go-to oils for seasoning my griddles.
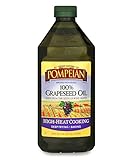
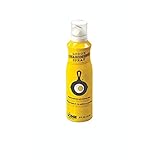
Other regular oils are fine for this task, just as Blackstone confirms. The Pompeian 100% Grapeseed Oil which is made of vegetable oil, is one of the most popular seasoning oil for griddles. The Canola Seasoning Oil from Lodge is also commonly used by griddle owners and BBQ masters. So, it’s your call.
Now, here’s the deal: stay away from low smoke point oils like coconut oil or even butter. They’ll burn up and leave you with a sticky mess. Remember, we’re going for a slick, non-stick griddle plate here.
Aside from the Blackstone Griddle Seasoning oil, you’d need tools for everyday maintenance and seasoning of your griddle. Thankfully, there are accessory kits made specifically for Blackstone griddles.
The Kesfitt Blackstone Griddle Accessories Kit looks the most popular. It includes two spatulas, two squeeze bottles (perfect for holding oil or seasoning mixtures), a scraper, and more. The squeeze or squirt bottles are pretty essential.
I like to fill one up with water to create steam while cleaning the griddle before the seasoning process. Just so you know, steam helps in loosening and removing any stubborn gunk or grease. Then you’d need the second for holding the griddle seasoning oil.
You’d need these for wiping and cleaning the griddle plate before and after seasoning. They help remove any debris or residue, ensuring a clean surface for seasoning.

Also called barbecue brick, a grill brick is great for scrubbing away any tough stains or residue on the griddle surface. They provide a little extra muscle when cleaning.
You need to protect your hands with heat-resistant gloves when working with hot surfaces. They provide insulation and allow you to handle the griddle comfortably and safely.
With these tools in your arsenal, you’ll be well-equipped to tackle the seasoning process and ensure your griddle is in top-notch condition for some epic cooking sessions!
Now here are the steps to season your brand new Blackstone griddle. Meanwhile, this procedure also works fine for any griddle, brand new or used.
I mentioned all the supplies you’d need for this procedure, from the Blackstone Griddle Seasoning Oil to the safety items. So, get them all ready.
Don’t worry, you can do without the accessory kit for now. But you sure need at least a squeal bottle. Whatever you use, ensure it’s food-safe and not some bottle used for storing dish soap or anything similar.
However, the truth is you’d still need an accessory kit for the everyday maintenance of the griddle.
Make sure your griddle is clean and free of any debris or dust particles. You don’t necessarily need to wash the griddle before seasoning. You want to avoid using water or any cleaning agents before the initial seasoning.
Simply give it a good wipe-down using a microfiber cloth, and that’s enough
Crank that heat up to high and let the griddle get hot and darken up. We’re talking sizzling hot.
This process is meant to turn the griddle plate into a stick-resistant and blackened surface. You’ll achieve this after 10 to 15 minutes of heating it up.
Once the griddle surface darkens, turn down the heat and let the griddle cool slightly. Now, it’s time to oil it up.
Grab your recommended choice of oil/conditioner. Then pour or squirt the oil onto the griddle surface. Use a brush to spread the oil evenly, but leaving a thin layer and covering every inch.
Let the oil heat up and start to smoke. This is called the smoke point. It’s where the real seasoning happens.
Keep the griddle on high heat for about 15-30 minutes. This will allow the oil to bond with the griddle and create a protective thin layer.

Turn off the heat and give that griddle a breather. Be careful not to touch the hot griddle surface now. It’s fiercely hot. Just leave it alone. Once it’s cool, grab a microfiber cloth and wipe off any extra oil. We want that slick, seasoned surface to shine.
Did you find any stubborn spots or residue? Don’t sweat it! Grab your handy grill brick and gently go to town. Give them a good scrubbing to ensure a smooth and clean cooking surface. Now, that’s it. That’s how to season a BBQ griddle.
Well, the truth is, nope! Blackstone themselves confirm it. You’ve got to roll up your sleeves and put in some work before you can rock your new Blackstone griddle.
Even if you see a factory coating on your griddle, don’t get too excited just yet. It’s still crucial to give it a proper seasoning.
So, grab that oil bottle and get ready to make it shine. Follow the steps provided, and you’ll be seasoning that griddle like a pro in no time.
Next, I’ll show you why seasoning your griddle is an absolute must:
If you spot some rust on your Blackstone griddle, now that’s not good. A rusty griddle isn’t nice for making your foods. You’ll be getting a lot of metal into your food. But fear not! Here’s all the lowdown on how to kick that rust to the curb:

Grab yourself some coarse salt. Make a thick salt paste with water and a few drops of lemon juice. Apply it on those rusty spots. Now, scrub with a damp cloth or sponge, using circular motions.
You can also moisten another cloth with distilled water and keep scrubbing away. This helps to avoid any mineral deposits that tap water can leave behind.
Now make sure to dry it thoroughly with a cloth or paper towel.
Next, you need to season or re-season that griddle. Follow the seasoning process explained earlier using oil to create a fresh, non-stick seasoning layer.
Remember, regular maintenance and proper seasoning can help prevent rust in the first place. But if rust sneaks up on you, don’t sweat it. Roll up your sleeves, give it some elbow grease, and watch that rust disappear.
Absolutely! It’s a safe and effective method to keep your griddle clean. But you can’t use just any soap. Anything harsher than dish soap, you might be damaging the griddle’s seasoned surface.
Now, here’s how to clean up your griddle with soap and water:
Don’t go diving in while the griddle is still hot. Let it cool down completely to avoid any nasty burns.
Grab your grill scraper or spatula and scrape off any leftover food bits or gunk clinging to the surface. Get it nice and clean.
Fill up a bucket or sink with warm water and add some mild dish soap. The Dawn Dish Soap is perfect for this. Mix it all up until you’ve got a delightful soapy solution.
Dip a non-abrasive sponge or cloth into that soapy goodness and gently scrub the entire griddle surface. Get into every nook and cranny, including the edges and corners.
Give the griddle a thorough rinse with clean water to wash away any soap residue. Of course, you don’t want any soapy surprises in your next meal.
Grab a dry cloth or some paper towels and give the griddle a good drying session. Remember, moisture is not our friend when it comes to rust. So let’s keep it nice and dry.
To prevent the griddle from rusting, you may want to give it a light seasoning after every use – after washing and drying it off. Follow the procedure provided earlier for this.

Congratulations, griddle masters! That’s all you need to know to season a Blackstone griddle. What I like about Blackstone griddles is their flat top pans are made to look like planchas. But they’re often exposed to moisture, and their materials are not proof of rust. That means you’ve got to give it some pre-use seasoning, especially if it’s fresh out of the box.
And once you do that, you’re guaranteed a rust-resistant griddle, a non-stick BBQ experience as well as an incredible final flavor for your dishes.
Just remember to gather your tools, pick an oil with a high smoke point, wear the safety gear recommended, and fearlessly embrace the heat as you create that perfect seasoning layer. I’m wishing you a happy griddling and happy cooking!