Using a Masterbuilt electric smoker requires you to know the startup process, preheating method, and how to manage the smoker during the cook.
I recently offered to host a cookout at a friend’s house only to realize that they had a Masterbuilt smoker. This meant that I had to do a deep dive on how to work this smoker. With research and some help from my friend, I figured it out!
In this post, I am going to show you how to use Masterbuilt electric smoker, with tips on seasoning and proper maintenance included. Let’s begin!
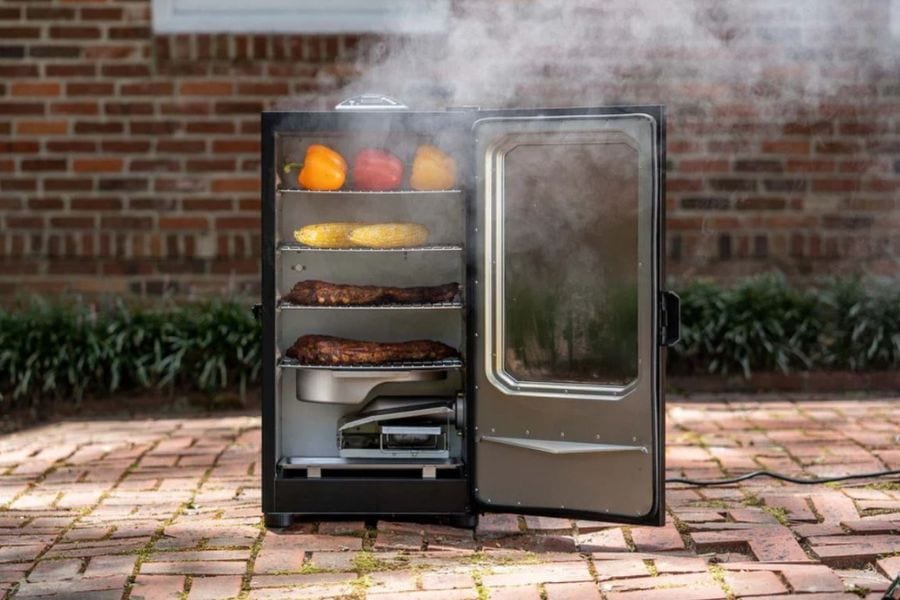
The first thing I want to mention is that the following instructions are meant to be an overall guide on how to use a Masterbuilt smoker.
The company has various electric smoker models to choose from. Some may have different settings and functions from the others. As a result, they will have separate instructions as well.
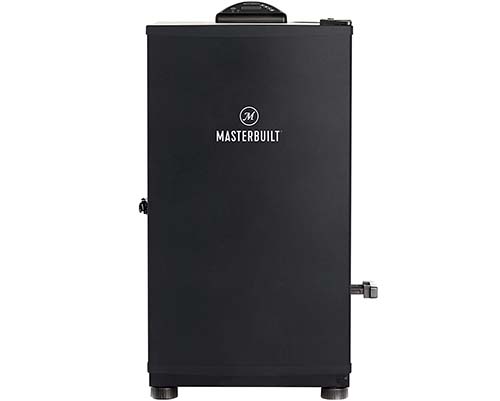
This is why it is important to always consult your instruction manual first. This will offer clear Masterbuilt smoker instructions on how to use your specific smoker.
In case you have a secondhand Masterbuilt electric smoker or have lost your manual, check out the Masterbuilt website as they may be able to offer you a manual.
You can also contact the company directly for older models.
Before you can figure out how to use a Masterbuilt electric smoker, you first need to know and understand the main components. Here they are:
This is the largest part of the smoker. It is the internal area where the smoking process takes place. It is equipped with cooking racks and sometimes smoking hooks for sausages.
In addition to being well insulated, the chamber is also equipped with a sealed door. This prevents heat and smoke from escaping out.
As the name suggests, this is the part of the smoker that creates and produces the heat. This component is typically placed at the bottom of the smoker. Some are in the same place as the smoking chamber, though.
Most smokers have just one heating element, although some may have two. The elements may also come with a thermostat for heat regulation.
The wood chips tray will depend on the specific model for your smoker. In some instances, it is a pan that is placed on top of the heating element.
In other smokers, it is an enclosed wood chip smoker box. This, too, is often placed on the heating element. The spaces in the box allow the smoke to escape through.
In newer models, the wood chips are placed in a tray insert that can be accessed from the outside. This is a great design as it allows you to empty out and refill the wood chips more easily.
This pan serves two important functions in your Masterbuilt smoker. To begin with, it adds moisture in the air, ensuring that your meat doesn,t dry out while it is being smoked.
This pan can also go a long way towards helping to keep the temperature of the smoker low. This helps with the low and slow process of smoking meat.
Just make sure to only ever add a cup of water to the pan at any time.
The purpose of the drip pan is to collect any grease or oil that will pour off the meat as it is being smoked.
This makes cleanup a lot easier. You simply have to empty out and clean out the pan.
If you have bought a brand new electric smoker, then the first thing that you need to do is to season it. The pre seasoning process allows to get rid of any oils or odors built up during the manufacturing process.
This is not a step that you want to skip. If you don’t season your smoker, your food may end up absorbing the surrounding odors, ruining all of your hard work.
Wipe down the inside of the Masterbuilt electric smoker with a damp cloth. Next, use a dry cloth or several paper towels to dry off the inside of the smoker completely.
It is a good idea to leave the door open for a while to ensure that the inside of the smoker is completely dry.
Now, the next step is optional. You can choose to apply a thin layer of vegetable oil on the inside of the smoker. Just make sure to give the heating element and similar components a miss when you do so.
The Masterbuilt smoker manufacturer doesn’t include this step in their manual. However, a lot of pitmasters do like to do this.
If you do decide to use oil, I would suggest something with a high smoking point, like avocado oil.
Dip a clean paint brush into the oil and apply a thin layer around the inside of the smoker, including the racks and the inside of the door.
Plug in the electric smoker. Place the empty water pan in its place – don’t add water during the seasoning process.
Set the smoker to 275 degrees Fahrenheit and smoke for 3 hours. During the last 45 minutes, add in half a cup of wood chips to the wood chip tray.
After the smoker seasoning has taken place, power down the machine. You can now use your Masterbuilt electric smoker to smoke meat.
Here is a step by step guide on how to work Masterbuilt electric smokers:
Before you turn on your electric smoker, first fill the wood chip tray.
You should only ever fill half cup of wood chips at a time. You can use wood chunks instead – make sure to use the equivalent of half a cup.
If you wish to cold smoke food, then you will need to place the wood chips in a cold smoker attachment instead.
Plug in the electric smoker.
After this, the steps that you will need to follow will determine if you have a digital Masterbuilt electric smoker or an analog one.
If you have an analog model, simply the turn the dial to your desired temperature. For most foods, this is 225 degrees F. For cold smoking, you will need to go lower.
In case you have a digital model, then press the ON button on the control panel.
Next, press the Set Temp button. Use the + and – signs to set smoker temperature. Then, press the Set Temp button once more.
Press the Set Time button to set your timer. Use the + and – buttons to adjust the time. Then press the Set Time button once more.
Wait until the cooking chamber has reached the appropriate cooking temperature. You can check the door thermometer to see when this has been achieved. Or, use your own thermometer.
Fill the water pan with one cup of water or desired liquid. Put it in its proper place.
Arrange the meat on the appropriate shelves and insert temperature probes into the meat.
Close the door and smoke for desired period of time.
For longer cooks, you will need to add more wood chips and top up the water pan. In case you are smoking larger cuts of meat, you may need to empty out the drip pan during the smoking process as well.
Depending on the temperature setting, you may need to do this every hour or so. When you add wood chips to the tray, box, or insert don’t add more than the maximum recommendation.
When you refill the water pan, don’t add more than one cup of water at a time. Adding too much can disrupt the temperature inside the smoker.
Once the meat or food has reached the desired internal temperature, take the smoked meat out of the electric smoker.
For an analog electric smoker, turn the temperature dial to the OFF position.
For a digital electric smoker, press the Power button until the smoker shuts off.
Wait for the smoker to cool down before trying to clean it.
Most newer models can be synced up to an app that you can download onto your smartphone.
Once synced up to the app, you don’t have to use the control panel on your Masterbuilt smoker. Instead, use the app to set the temperature, timer, and even keep an eye on each meat probe.
It is also possible to power down the smoker from your app.
When using the app, it is a good idea to ensure that the action has actually taken place on the smoker.
Here are the top tips and tricks to follow to use a Masterbuilt electric smoker the right way:
Your Masterbuilt electric smoker is quite powerful. As such, it needs to be plugged into a proper outlet each and every time.
It is advised that you plug your Masterbuilt smoker directly into an outlet when possible. If you do need to use an extension cord, it must be marked with W-A. It should also have a label indicating that the cord can be used with outdoor appliances.
Due to its design, a Masterbuilt electric smoker can take a bit longer to heat up in comparison to other electric smokers.
Depending on your model, this can take as much as 45 minutes at a time. Despite this, you shouldn’t become impatient and put the food in before the chamber is fully heated.
The thermostat on the smoker will let you know when the smoker is ready. You can also use your own device for greater accuracy.
This will cause the food to cook unevenly. It will also be trickier to estimate when your food will be ready to eat.
I know that some people like to line the smoking rack with aluminum foil as it helps with the cleaning process. However, this is something that you should avoid.
See, the foil prevents proper heat circulation. Remember, there is only a single heat source in your electric smoker. Thus, it is only with circulation that the smoke and heat can travel throughout the internal chamber.
On a similar note, don’t shove too much food onto the cooking racks. This, too, will cause issues with heat circulation.
In turn, it means that the food will cook unevenly.
If you are cooking for a crowd, it is best to smoke the food in batches. Thus, you will need to plan accordingly and start the smoking process much earlier.
Of all the Masterbuilt electric smoker tips, this is probably one of the most important one to remember.
Whenever you open the door, you allow hot air to go out. This can cause a flare up. The best way to reduce this risk is to keep the door closed as much as possible.
Of course, you will need to open the door to add in more wood chips or refill the water. Make sure to open and close the door quickly when you do so, though.
Furthermore, never keep the door closed while you are doing this. Even transferring food in and out of the smoker, make sure to keep the door closed for most of this time.
If you do notice a flare up, close the door immediately. This should help to calm it down.
To ensure that you get as much smoke as possible, preheat your smoker on the highest setting. This will cause the wood chips to ignite more quickly.
Once the smoker has been preheated, turn the smoker temperature to the proper cooking temp.
While you can soak wood chips before placing them in the tray, it is best to avoid this if you want more smoke.
Soaked wood chips produce more steam instead of smoke.
The other thing that you can do is to keep a close eye on the rate at which the wood chips are burning. When it is mostly ashes, swap these out for fresh wood chips.
This is what you need to know to use a Masterbuilt electric smoker the right way. All that you have to do now is to put this knowledge to the test! Go ahead and give it a try!