The best way to cook a tender roast is to choose the right cut, roast it low and slow, check the internal temp, and more!
I was taught how to cook the perfect roast beef in culinary school. Now, I have played around with some of the ingredients since then but I have stuck to the techniques ever since.
In this post, I will show you how to cook melt in the mouth roast beef each and every time! Let’s get started!
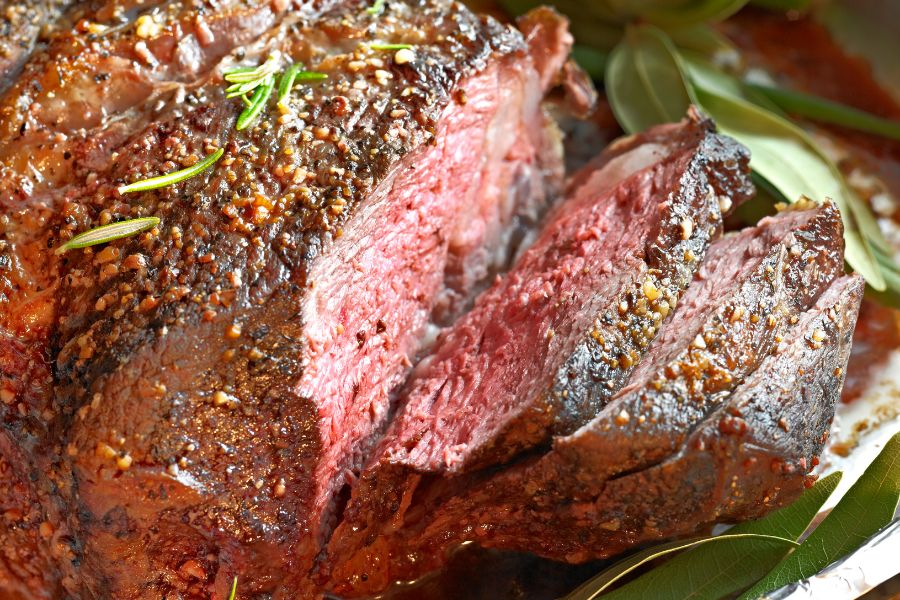
Melt in your mouth roast beef all starts with the right recipe. Here is the one that you should follow for the most delicious and tender results:
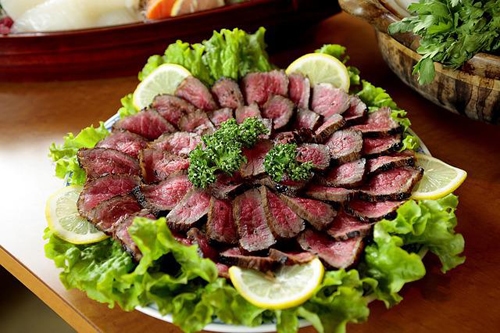
Take the beef roast out of the refrigerator at least 45 minutes out before roasting.
Preheat oven to 275 degrees F.
In a small bowl, combine the ingredients of the seasoning well.
Then, use your hands or a brush to apply the seasoning to the entire beef roast.
Heat a cast iron skillet over high heat. Add in a pat of butter and swirl around the pan until fully melted.
Place the beef roast in the pan. Cook on one side until browned and then turn to the other. Repeat until all the sides are browned but the beef roast is not cooked through.
This should only take a few minutes.
Take off the heat.
Insert a roasting rack in the roasting pan.
Place the beef roast in the roasting pan. Insert a meat thermometer into the thickest part of the meat.
Place the beef roast in the oven.
Cook roast beef until the internal temperature registers at 120 F for rare meat or 125 F for medium rare.
Take the roasting pan out of the oven.
Transfer meat to a cutting board and let rest for up to 30 minutes.
Reserve the drippings from the beef.
Slice and serve roast beef after it has rested.
Pour the beef broth or beef stock and the beef drippings in a pan. Place on the stovetop and turn to medium high heat.
Add in the garlic powder, onion powder, and Worcestershire sauce. Stir until the ingredients are completely dissolved.
Add the cornstarch and water into a small bowl and mix well until all the lumps are dissolved.
Add to the beef broth mix and stir well until all the ingredients are mixed.
Lower the flame and cook until the gravy has thickened. Keep stirring throughout.
Add salt and pepper to taste.
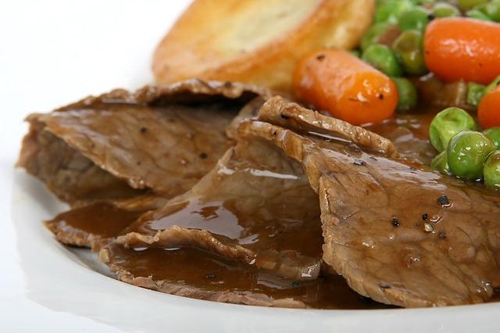
Related Reading
It can actually be a bit confusing when choosing cuts of beef for your roast beef recipe. This is because there is no one cut to choose from.
In the States, the most common cuts for a roast are eye of round roast, top round roast, bottom round roast, and top sirloin tip roast.
In the UK, people will also choose rib roast, top rump roast, and fillet.
Essentially, there is no right or wrong answer here. Instead, it is about selecting beef roasts that you like the best.
The reason that you have so much of choice for roast beef has to do with how the meat is cooked. See, here, you cook the beef roast low and slow. This gives all those tougher cuts a chance to break down, resulting in a more tender roast beef.
As you can see from the recipe, I prefer eye of round roast for roast beef. This is because it has a nice robust flavor that is taken to the next level when it is roasted.
This is a question that I get quite often. After all, tenderloin is one of the most tender cuts of beef. So, doesn’t this naturally mean that it will produce a moister roast beef?
The thing is, tenderloin is a fairly lean meat. As a result, it is best to cook this cut quickly and over high heat. Due to this, the roasting process isn’t best for tenderloin.
To add to this, it is a pretty pricey cut of meat and doesn’t yield much meat either. So, unless you want to spend a small fortune on your dinner, you may want to stick to more affordable cuts.
Yes, the grade of the beef does matter in this case. Now, you may think that terms like Prime, Choice, and Select don’t mean much, but they do.
The thing about Prime beef is that it usually comes from younger cows. Not only is the meat juicier, but the cuts have a lot more marbling running through them.
Marbling is fat and fat adds moisture to the meat while cooking. This prevents the roast beef from drying out. Fat also makes your roast taste a whole lot better.
As a Prime cut of meat can be pricey, I get why this might not be your first option. Well, Choice also has enough marbling to stand up to roasting without drying out.
If your main goal is to get melt in your mouth roast beef, then I would advise choosing a cut that is of a lower quality than Prime. Those other cuts just don’t have enough marbling in them to guarantee a truly juicy roast beef.
As you will have noticed, it is far more common to buy boneless beef roasts. For one thing, boneless cuts tend to cook faster. They also cook more evenly, ensuring a consistent taste and texture throughout.
Also, when slicing into boneless roast beef, you don’t have any obstacles in your way.
That being said, if you want to ensure a juicy and tender roast, the bone in may be the way to go. Bones are great for trapping moisture in the meat, reducing the risk of them drying out.
Furthermore, they add some serious flavor into the mix as well.
So, if you want to be certain that your roast beef will be as close to perfect as possible, a bone in roast may be the way to go.
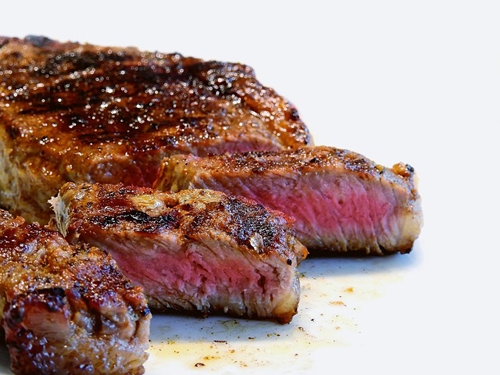
If you look at the recipe instructions, I have recommended taking the roast beef out of the refrigerator about 45 minutes before you roast it.
Believe it or not, this is an important step.
Taking the roast out ahead of time allows the meat to warm up a little. In doing so, the meat cooks more evenly in the oven.
So, why is this important to roasting beef? Well, when the beef roast cooks all over at the same rate, the entire cut reaches doneness at the same time.
Due to this, you don’t have to leave the roast in so that others parts of the cut can get to the right level. In doing so, you can avoid any part of the roast beef overcooking and drying out.
Make sure that you don’t leave the beef out longer for an hour though. When beef is left out on the counter for too long at room temperature, there is a high risk of foodborne illnesses.
It is also a good idea to make sure that the cut is covered the entire time that it is left out of the fridge.
I would argue that it is absolutely necessary to sear the beef. The searing process gives the roast beef some flavor and a nice crusty exterior as well. This isn’t something that you can always get with roast beef prepared in the oven alone.
There are a few key guidelines to follow to get the searing process just right.
To start with, use a cast iron skillet for searing. The heat dispersion on this pan is excellent and it also holds heat well.
This allows you to brown the meat quickly, preventing it from cooking all the way through.
Since the pan is very hot, though, make sure to keep a close eye on the searing process. The moment that one side is browned, flip it over. You don’t want the roast beef overcooking.
If you can’t be bothered with the hassle of searing the beef in the pan, this process can take place in the oven as well.
After preheating the oven, turn the oven temperature to 350 F or even 400 F.
Place the roast in the oven and cook for no more than 30 minutes. Then, take down the temperature to 275 F and cook until done.
Now, you can also try this process in reverse – first cook the meat on low and then take the temperature up in the last half hour of cooking.
The only problem with this method is that it can be tricky to figure out just when to turn the heat up. As a result, you may end up drying out the meat.
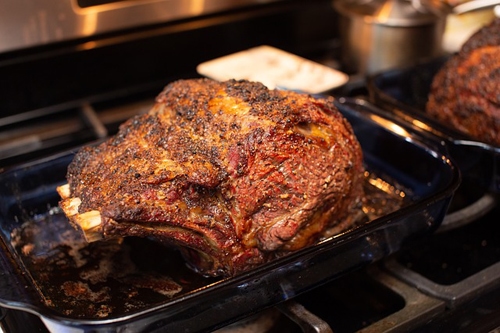
I am always surprised when I see recipes asking you to turn up the temperature to 350 F or even higher!
See, at a high temperature, your meat is more likely to dry out – quickly. Due to this, it is important to cook your meat at a lower temperature for a longer period of time.
Another benefit to slow roasting your roast beef is that it gives connective tissue and fat time to break down. This is what makes the beef tender and moist.
In this way, it is much like cooking a pot roast in a slow cooker. Of course, here, you don’t add any additional moisture to the meat and cook it dry.
I have found that 275 F is the right temperature for me. There are some people who like to take it even lower, down to 225 F.
While this is fine, make sure to consider how much longer the meat is going to take to cook and start cooking roast beef at an appropriate time.
The main piece of advice that I do have to offer here is to never cook roast beef above 300 F. This is almost a surefire way to end up with an overcooked roast beef on your hands.
Just have a little patience and let the low heat due its work.
I would say that one of the main hacks for getting tender roast beef is cooking according to internal temperature rather than cooking time.
Now, at 275 F, the meat can cook at a rate of one hour per pound, approximately.
The problem is that it can be really hard to calculate the actual cooking rate. The overall cooking time can depend on the size and the weight of the cut as well as how fatty or lean it is.
What’s more, every oven is different. So, even if you set your oven to 275 F, there is no guarantee that it will cook at the same rate as my roast beef.
It is because of these discrepancies that it is so easy to overcook the meat.
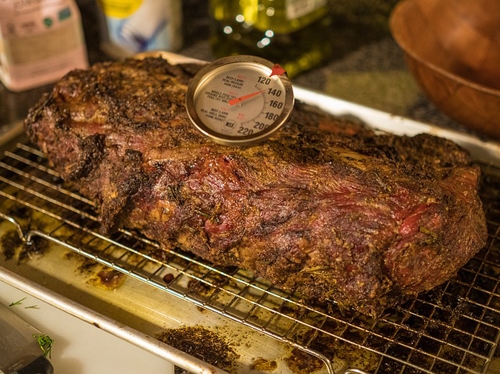
To prevent this from happening, always use a meat thermometer to track the internal temperature throughout the roasting process.
This way, the moment that the beef registers the right level of doneness, you can take it out of the oven.
Now, you may have looked at the recipe and thought that I was asking you to take the roast out of the oven earlier than you are comfortable with.
If you want a tender roast beef, though, it is best not to cook it above medium rare. This ensures that the middle of the roast beef is nice, pink, moist, and tender.
Now, the thing to keep in mind is that meat will continue to cook once it is taken out of the oven. The internal temp can actually go up by as much as 10 degrees even when the roast isn’t exposed to heat any longer.
This is why you need to take the meat out at 120 F if you would like rare meat and 125 F if you prefer medium rare beef.
I would advise against cooking the roast any higher than this.
The best course of action is to buy a meat thermometer that can be kept inside the roast while it is cooking.
Look for ones that have an app or that you can see the temperature from outside the oven.
This way, you don’t have to keep opening the oven day to check on the temperature. Keep in mind that every time that you open the door, your disrupt the temperatures inside the cooking chamber.
In turn, you can alter the rate at which the roast cooks.
If you don’t have a meat thermometer that can be kept inside the roast, then use the cooking rate as a guide.
As mentioned, the meat may cook at a rate of an hour per pound. Based on this, check the internal temp after the first and second hour. After this, check the internal temp after a 30 minute interval and then a 15 minute one.
As you get closer to the roast getting done, you need to be extra cautious about the rate of cooking.
There are some who will add beef broth, beef stock, or a gravy like liquid to the beef while it is roasting.
This is to ensure that the meat will turn out tender.
Here’s the thing, though, you aren’t really roasting your meat in this case. As such, you are less likely to get a traditional oven roast beef at the end.
Unlike pot roast, this dish is meant to be prepared dry. This is what gives you a firmer, almost crispy exterior and a nice tender interior.
I know you may be nervous about whether or not you can actually make a tender roast and may want to add liquid to improve the odds in your favor.
However, there is no need for you to do this. For one thing, braising liquid is required for leaner cuts such as chuck roast or prime rib roast.
The meat that you are using for this recipe has a bit more fat to it. So, it doesn’t really require any added moisture.
Instead, just cook the meat on low and pay attention to the internal temperature to guarantee delicious results.
This is another technique that people wonder about. Wrapping the foil over the roasting pan and the beef traps moisture inside. This prevents the meat from drying out.
Here is the issue, though. Too much moisture is trapped inside when you do this. As I mentioned earlier, this dish needs to be dry cooked. So, very little moisture should be added to the process.
If you wrap the meat in foil, it is going to become very soft and borderline mushy. In short, it is not going to taste very good at all.
However, if you simply follow the roasting tips I have mentioned here, you should be fine.
I know it may be hard to believe, but resting plays a pretty important role in turning out a tender roast.
See, when the roast is heated in the oven, the tissues begin to constrict. As this happens, the liquid in the tissues is pushed outside towards the surface of the roast. This dries out the meat on the inside.
When you rest the roast, though, the temperature eventually comes down. This causes the tissues to relax, allowing them to reabsorb this lost liquid. If you give the tissues enough time, they can reabsorb most of the liquid that evaporated. ensuring the meat will be nice and juicy.
Make sure to rest the meat for at least 30 minutes before cutting and serving.
This may seem like a lot of time, but consider the resting time when trying to figure out when you should start cooking.
You can assume that a 3lb roast is going to take about 3 hours to cook and ten factor in the resting time as well.
This way, you won’t keep your family members or guests waiting.
Related Reading
Yes, the way that you slice the roast can also contribute to the overall texture. This is why it is important to slice against the grain.
To find the grain, set the roast in front of you and look at the direction in which the muscle fibers are going in. It is normal for a cut to have more than one grain.
Once you have identified one grain, cut in a parallel line to the grain. As you approach the other grain, turn the roast around. Then, start cutting against that great.
It is a good idea to slice as thinly as possible. Try to only cut as much as you are planning on serving.
Related Reading
It is best to keep the roast whole until you are planning on slicing and serving.
Take the whole roast and place in an airtight container. You can keep it in the freezer for 3 or 4 days.
If you are freezing the roast, place in a freezer bag and squeeze the air out before sealing. It can be kept for a few months.
Related Reading
The best way to cook this meat is using the low and slow method – it is also important to keep an eye on the internal temperature.
It can take around 2 hours to cook a roast at this temperature.
If you want to serve up the perfect roast beef time and time again, then this is all the information that you need! Follow these guidelines and you will become a pro at making the best roast ever!