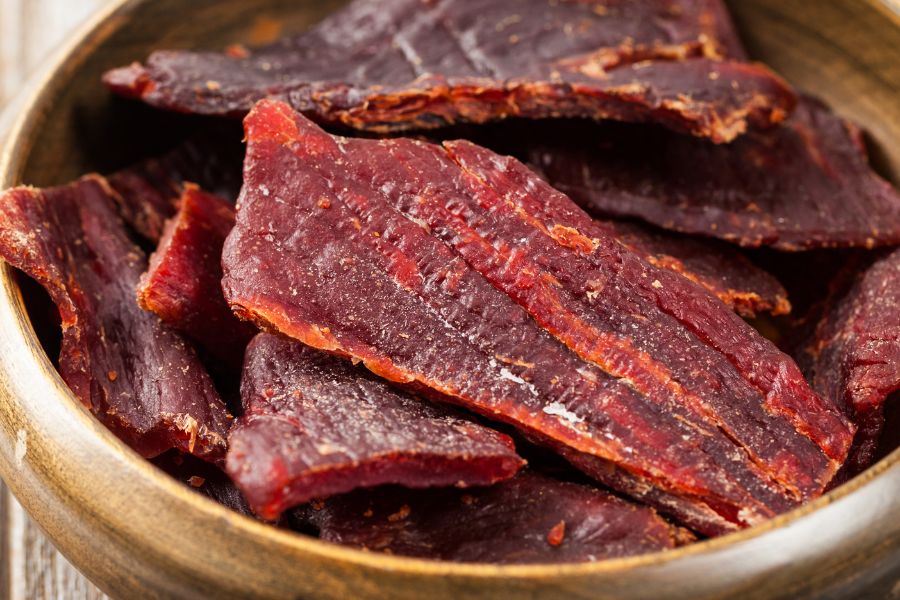
To make homemade beef jerky, you need to slice the meat thinly, let it sit in a marinade, and then cook it in the oven at a low temperature.
As I get older, I am more conscious of what I eat. And, while I love beef jerky, I am not crazy about all the sodium, additives, and other ingredients that go into it. So, I taught myself how to make it in an oven!
In this post, I will show you how to make beef jerky in the oven and offer up tips to get it just right too!

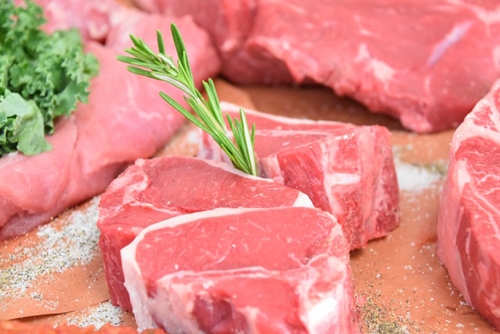
It is important to choose the right cut of meat when making beef jerky. The key here is to use a lean cut.
This can include top round steak, bottom round, eye of round, flank steak, or sirloin tip.
Of course, flank steak is a pretty pricey option but it will produce the best results. This is because it is incredibly lean but also has plenty of flavor.
If you are looking to keep the cost of homemade beef jerky to a minimum, then it is best to go with eye of round, top round, or bottom round.
Related Reading
When it comes to beef jerky, you want a chewy texture that is also a bit dry. It is easiest to get these results with the leanest cuts as they have less moisture in them.
The other benefit of lean cuts of beef is that they actually last longer. The presence of fat in beef jerky recipes can reduce the shelf life of the product. This means that you need to cut out the fact if you want your jerky to be shelf stable.
At the same time, look for cuts that have a strong beefy flavor. This is important as this meat will not have fat to add flavor during the preparation process. Thus, it needs to have its own flavor profile that will translate well when the meat is being dehydrated.
You can also make ground beef jerky using ground meat or ground chuck. Now, ground beef tends to be naturally lean and this can mean that you don’t have to bother prepping the meat.
Despite these plus points, I would advise against using ground beef for your homemade beef jerky. This is because you will end up having to roll out the jerky so that it resembles regular meat and then find a way to cut it into thin slices without disrupting the structure.
Now, if you have a jerky gun, then this does take some hassle out of the equation. If you don’t have this implement, though, I would stick with regular lean cuts.
Related Reading

Believe it or not, how you slice the beef for the jerky can make all the difference to the final product.
The key here is to slice the meat as thinly as possible. Try to make each slice about 1/4th of an inch thick.
It is also important to try and make the beef strips the same thickness. This way, they will cook at the same rate in the oven.
Use a sharp knife so that you will be able to cut through the meat easily, leaving a smooth cut.
I know that cutting meat slices like this is no easy task. If you feel like you aren’t up for it, it is best to get your butcher to do this for you. After all, you don’t want too thick slices to ruin your homemade jerky, do you?
A great trick for slicing the meat more evenly is to place the beef in the freezer for about half an hour. Then, take it out and slice immediately.
The manner in which you cut the beef matters quite a bit as well. Now, you may have heard of the grain in meat – this is the direction in which muscle fibers are aligned in any particular cut.
If you cut in the same direction as the grain, it is known as cutting with the grain. Doing this will result in a chewy jerky.
In case you prefer tender jerky, then cut against the grain. This means cutting perpendicular to the grain.
Trim any fat that is on the cut
Slice the meat into thin strips – the thinner, the better.
Add all the ingredients into a bowl and combine well. If using brown sugar, make sure all the crystals are completely dissolved before proceeding.
Place the beef strips in a Ziploc bag. Pour in the marinade and seal tight. Make sure that all the beef is coated in the marinade.
Place in the refrigerator for between an hour and 24 hours.
Preheat the oven to 175 degrees F.
Line the baking sheets with aluminum foil.
Place wire racks on each tray.
Arrange the beef in a single layer, making sure not to overlap one piece on top of the other.
Place the sheets in the middle and bottom rack – leave the top one free.
Cook for 4 hours or until the beef jerky is firm but bendy.
After about 2 hours into the cook, flip the strips of beef over.
Take the beef jerky out of the oven and let cool.
Store in an airtight container.

Related Reading
The marinade is a pretty important part of your homemade beef jerky recipe. After all, it is what adds most of the flavor to the meat.
Now, there is no need for you to stick to the recipe that I have provided here. You are free to alter it to suit your favorite flavors.
I do like my homemade beef jerky to have a smoky flavor which is why I have added liquid smoke. The smoked paprika is a nice touch too. If you aren’t a big fan of the smokiness, then skip these ingredients.
Some people like to go sweet, loading up on maple syrup. If you like both sweet and spicy, then throw in some red pepper flakes in there too.
If you want to cut on the salt levels in this recipe then consider using low sodium soy sauce instead. In case you do make this adjustment, I would advise adding just a teaspoon of kosher salt to the recipe or you may find it lacking flavor.
You are free to experiment with various flavors, I would suggest dividing up the batch into smaller amounts and then adding different flavor combinations to these. This will help you discover the winner for your homemade beef jerky.
The longer that you can marinate the beef for, the better. If I am short on time, I will let the meat sit in the marinade for about three or four hours. Otherwise, I will marinate it overnight or even a full day.
The exact length will depend on how much flavor you want for your homemade beef jerky. If you prefer a mild flavor then marinate the meat for a shorter period of time. For a stronger taste, keep it in for longer.
It is important that the beef is in an elevated position in the oven. This allows warm air to circulate around each strip, drying it out. Placing the beef on a wire rack will do the trick.
I have seen some people thread skewers through each strip of beef and balance the skewers from the topmost oven rack. This will produce results similar to that of a dehydrator as there is maximum airflow here.
At the same time, this is an awful lot of work. So, if you don’t have the time to do this, simply place the strips on a wire rack.
As I mentioned, don’t place the meat on the first rack as this area will be too hot.
If you don’t have enough room for all the beef jerky on the other two racks, then cook the meat in batches.
The temperature that I use is 175 F. You can go up to 200 F if you want, but I have found that the lower temperature is best. You get a chewy texture but are able to avoid that desiccated feeling to the meat.
Remember that the meat is sliced quite thin. So, if you go too high, you could end up overcooking the meat too much. This can impact both the texture and the flavor.

Related Reading
Yes, you can and you can get similar results to making jerky in a dehydrator.
It can take around 4 hours for strips that are around 1/4th inch thick and longer for thicker slices.
While the dehydrator is easier to use and will produce a chewier effect, you can make great beef jerky using an oven.
Well, there you have it – a guide to making the best beef jerky you have ever tasted. Once you have given this a try, you are sure to never go back to the store bought version again.